

How to Plan Your Backyard Bird Sanctuary on Graph Paper
A Backyard Bird Sanctuary Rarely Starts with a Shovel
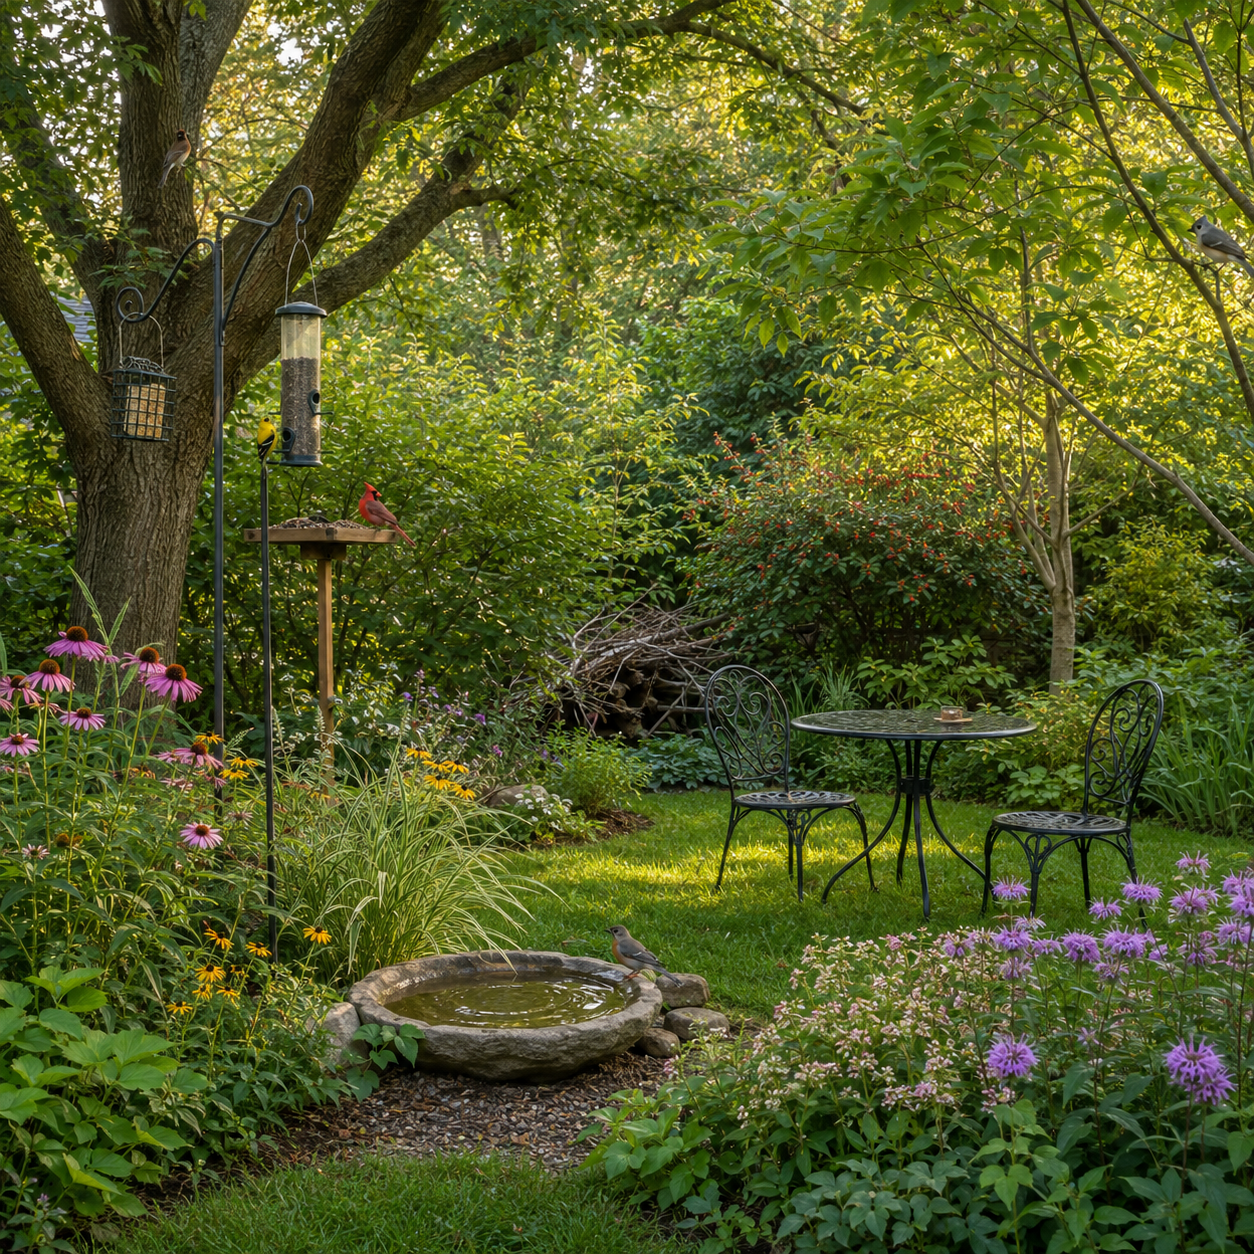
It begins with a little observation, a few ideas—and, if you want to save yourself time and money, a simple plan on graph paper.
You do not need to be a landscape designer. You do not need special software. And you definitely do not need to redesign your entire yard in one weekend.
Graph paper simply helps you see your backyard differently. Instead of looking at one large space and wondering where to begin, you can break it into smaller, manageable areas. You can experiment with trees, shrubs, feeders, water and pathways before you spend money or move anything heavy.
Most importantly, you can begin planning your yard from a bird’s point of view.
Begin With the Yard You Already Have
Before adding anything to your plan, draw what is already there.
Start with the approximate shape of your property. It does not have to be surveyor-perfect. Measure the major distances or pace them off, then choose an easy scale.
For example:
One square might equal one foot in a small garden.
One square might equal two feet in an average backyard.
One square might equal five feet if you have a large property.
Write the scale in one corner so you will remember it later.
Next, mark the permanent features:
Your house
Garage, shed or outbuildings
Deck, patio or porch
Driveway and sidewalks
Fences and gates
Utility boxes and overhead lines
Existing trees and large shrubs
Garden beds
Drainage areas
Air-conditioning equipment
Windows and doors
Outdoor faucets and electrical outlets
You are creating a working map, not a piece of art. Circles can represent trees. Rough cloud shapes can become shrubs. A few straight lines can show a fence or pathway.
Use pencil. A backyard sanctuary plan should be easy to change.
Watch Before You Plan
Now step away from the graph paper and spend a little time outside.
Where does the morning sun reach the yard? Which section becomes hot and dry in the afternoon? Where does rainwater collect? Which corner stays protected from strong wind?
Notice how you use the yard, too.
Where do you naturally sit with your coffee? Which window has the best view? Where do children or pets play? What route do you use to reach the shed, garden or gate?
Mark these things on your plan with simple notes:
Morning sun
Afternoon shade
Wet after rain
Strong north wind
View from kitchen
Dog area
Quiet corner
Poor drainage
Then watch the birds.
Even a fairly plain yard probably has more bird activity than you realize. Robins may search the lawn for worms. Chickadees may investigate a mature tree. Sparrows may gather beneath an existing shrub. A cardinal may use the fence as a stopping point before crossing the yard.
Draw arrows showing the directions birds commonly travel. Circle their favorite areas. Add a question mark wherever you think additional cover might encourage them to stay longer.
This observation period is one of the most valuable parts of the entire project. You are not forcing a sanctuary into your yard. You are learning where a sanctuary is already beginning to form.
Think in Layers, Not Isolated Plants
A yard can contain plenty of plants and still offer very little useful habitat.
Birds need structure. In a natural habitat, vegetation usually grows in several layers:
Tall canopy trees
Smaller understory trees
Shrubs
Grasses, flowers and ground cover
Leaf litter and fallen natural material
Different birds use different layers. A woodpecker may forage along a trunk while a warbler searches among leaves. A cardinal may nest in a dense shrub, and a towhee may scratch through fallen leaves below it.
On your graph paper, look for places where you can begin connecting these layers.
Perhaps an existing tree has nothing beneath it except lawn. You might sketch a group of shrubs near the tree, then add native flowers, grasses or ground cover around the shrubs.
Instead of drawing one shrub in the middle of an open lawn, draw three to five shrubs together. Planting in groups can create a more useful block of shelter while also looking intentional from a landscaping standpoint.
You do not have to add every layer to every corner. The goal is variety.
A combination of plant heights creates more places for birds to feed, rest, hide and eventually nest. Audubon recommends locally native plants because they can provide birds with insects, berries, nectar, seeds and refuge suited to the surrounding ecosystem. Even a small native planting can become a useful patch of habitat.
Plan Food That Grows in the Yard
Bird feeders can be wonderful additions, but the strongest sanctuary plans do not depend entirely on purchased seed.
Begin by marking possible locations for native food-producing plants.
Look for room to include several types:
Berry-producing shrubs
Seed-producing flowers
Native grasses
Nut- or acorn-producing trees
Nectar-producing flowers
Plants that support caterpillars and other insects
Insects are especially important during nesting season. Even birds we usually think of as seed eaters may feed insects to their young.
Try to create a sequence of natural food throughout the year. One plant may bloom in spring, another may produce berries in summer, and native flowers and grasses may hold seeds into fall and winter.
You can make a small seasonal chart in the margin of your graph paper:
Season Possible Food Sources
Spring Early flowers, insects and emerging buds
Summer Caterpillars, nectar, fruits and berries
Fall Seeds, nuts and late berries
Winter Persistent fruit, seed heads and evergreen cover
There is no single plant list that works everywhere. A plant that is valuable in Texas may be unsuitable in Maine, Colorado or Oregon. Use a regional native-plant database, your state native plant society or a local extension office to identify plants suited to your soil, moisture and growing conditions.
On the plan, write the plant’s mature size—not the size it will be at the nursery. That small shrub in a one-gallon pot may eventually grow six or eight feet wide. Planning for its mature spread prevents crowding and saves you from having to move it later.
Add Water Where Birds Can Find It—and You Can Maintain It
Water may attract birds that never visit a seed feeder. Robins, waxwings, warblers and other non-seed-eating birds still need places to drink and bathe.
Draw several possible water locations before choosing one.
A good location should be:
Visible to birds
Easy for you to refill and clean
Close enough to cover for birds to retreat
Open enough that birds can watch for danger
Accessible to a hose or other convenient water source
A birdbath does not need to be expensive. A shallow basin with gently sloping sides can work beautifully. Cornell recommends shallow water—generally an inch or two deep—rather than a deep, steep-sided container.
Do not hide the bath inside dense vegetation where a cat could wait unseen. A nearby shrub or small tree can offer an escape route, but birds should have a clear view around the water.
On your graph paper, draw the bath and then add a lightly shaded “open zone” around it. Beyond that zone, sketch the nearest protective shrubs.
Also plan how you will reach the bath. If cleaning it requires squeezing behind thorny shrubs, you will be less likely to maintain it regularly. A stepping-stone path can make an enormous difference.
Fresh water is the goal. The U.S. Fish and Wildlife Service recommends cleaning birdbaths often to reduce the risk of spreading disease.
Place Feeding Stations Carefully
If feeders will be part of your sanctuary, give them their own small planning area on the graph paper.
Think of a feeding station as more than a pole stuck in the lawn. It may include:
One or more feeders
A suet cage
A tray or seed catcher
Nearby shelter
A storage location for seed
A comfortable viewing spot
A safe path for cleaning and refilling
Place the station where you can enjoy it. A feeder hidden in the farthest corner of the property may help birds, but it will not do much to help you reconnect with them.
Look at the plan from inside your house. Draw sight lines from the kitchen window, breakfast table, favorite chair or home office. Try to position the feeding station where it can turn an ordinary part of your day into a few minutes of birdwatching.
You also need to consider windows. Feeders and habitat placed near reflective glass can increase collision risks unless the windows are properly treated. The U.S. Fish and Wildlife Service recommends applying effective visual markers to the outside surface of problem windows. Window safety should be included on the sanctuary plan from the beginning, not added after a bird strikes the glass.
Add a small symbol beside any window that may need screening, exterior markers or another collision-prevention treatment.
Feeders also need regular cleaning and monitoring. If birds appear sick, pause feeding and clean the equipment thoroughly. A sanctuary should make the yard safer, not simply attract the greatest possible number of birds.
Create Shelter and Escape Routes
Birds are more comfortable when they do not have to cross a large open space to reach food or water.
Use your graph paper to identify gaps between important features. If your feeder is twenty feet from the nearest shrub, could you add a small planting between them? If birds use a tree along the back fence, can you connect that area to another patch of cover?
You are trying to create safe stepping-stones through the yard.
Evergreen shrubs and trees can provide valuable cover during winter and severe weather. Dense deciduous shrubs may offer nesting sites. Native grasses and ground covers protect smaller birds closer to the soil.
If your yard has a tucked-away corner, consider drawing in a modest brush pile. Larger branches can form the base, with smaller branches layered over them. Cornell notes that brush piles can provide shelter for ground-dwelling birds such as sparrows and towhees.
A dead tree or standing trunk can also provide important habitat, but only when it can be retained safely. Have questionable trees evaluated, especially if they could fall onto a house, walkway, fence or neighboring property.
Leave a Little Useful Mess
A bird sanctuary does not have to look neglected, but it probably should not look sterile.
Fallen leaves shelter insects and give ground-feeding birds places to forage. Spent flower heads hold seeds. Small patches of bare soil may help some birds find food. Dead stems and natural material can support the tiny creatures that keep the larger habitat working.
Choose the areas where you can tolerate a softer approach.
On your plan, you might label:
Leaf litter under shrubs
Seed heads left for winter
Low-mow area
Brush pile
Natural corner
Spring cleanup delayed
You can balance these areas with clear edges, paths and more traditional landscaping near the house. A mown border around a native planting, for example, can make the space look intentional while leaving the interior useful to wildlife.
The goal is not to let the entire property become overgrown. It is to decide where natural processes can continue without being constantly cleaned away.
Remember the Human Side of the Sanctuary
Your backyard should work for you as well as the birds.
Add a chair, bench or small sitting area to the graph-paper plan. Consider shade, privacy and the direction you will face.
What will you see from that spot? Can you watch the birdbath without sitting so close that birds avoid it? Will you be able to observe several vegetation layers at once? Is there a place for binoculars, a field guide or a cup of coffee?
Include paths wide enough for comfortable use. If steps, steep slopes or uneven ground may eventually become difficult, plan a simple route between the house, seating area, feeders and water.
The best sanctuary is one you will use. Your presence in the yard is not separate from the project. The quiet moments you spend watching, noticing and learning are part of its purpose.
Turn the Drawing Into a Realistic Project
Once your first plan is finished, do not rush to install everything at once.
Choose one project for each phase.
Phase One: Make the Yard Safer
Treat hazardous windows, keep cats indoors or in a secure catio, reduce pesticide use and remove any obvious dangers around feeding or bathing areas.
Phase Two: Add Water
Install a simple birdbath where it is easy to see, refill and clean.
Phase Three: Improve One Habitat Layer
Add a small group of native shrubs, expand a flower bed or replace a section of lawn with native grasses and flowers.
Phase Four: Connect the Pieces
Fill an open gap between existing trees, shrubs, water and feeders. Create a pathway birds can follow through protective cover.
Phase Five: Add Comfort and Personality
Place your chair or bench. Add a path, journal shelf, small sign or other feature that makes the sanctuary feel like your own.
Use colored pencils to show the phases on your graph-paper plan. Green might represent the first year, blue the second year and orange the projects you hope to complete later.
This keeps the dream from becoming overwhelming.
What If You Only Have a Patio, Balcony or Tiny Yard?
You do not need a large backyard to create useful habitat for birds.
A balcony, patio, narrow side yard or postage-stamp patch of grass can still provide water, food, shelter and a safe place for birds to pause. In a small space, graph paper may be even more helpful because every square foot needs to work harder.
Draw the space to scale, including doors, windows, railings, walls and any areas that receive sun or shade. Then think vertically as well as horizontally.
A small-space bird sanctuary might include:
A shallow birdbath or railing-mounted water dish
Containers filled with locally native flowers and grasses
A large pot holding a berry-producing shrub
A trellis with a native climbing plant
One carefully chosen feeder
Window treatments that help prevent collisions
A folding chair positioned where you can quietly watch
Group containers together when possible. A single flowerpot may offer a little food, but several pots planted at different heights begin to form a miniature habitat layer. Tall grasses, a compact shrub and lower flowers can provide more variety without taking over the space.
Renters can concentrate on movable features such as containers, freestanding trellises and portable water dishes. Before hanging feeders or attaching anything to a railing, check building and landlord rules. Feeders may not be appropriate where spilled seed could fall onto neighboring balconies or attract unwanted animals, but native plants and clean water can still make the space inviting.
Most importantly, do not measure the value of your sanctuary by its size. A small patch of native flowers can give a migrating bird a place to rest and refuel. A clean dish of water may become a regular stop during hot weather. Even one well-planned corner can help.
Let the Sanctuary Change With What You Learn
Your first drawing will not be your final drawing—and that is good.
Keep the graph-paper plan in your birding journal or garden notebook. Add the dates when shrubs were planted. Note which flowers attracted hummingbirds, which berries disappeared first and where birds sheltered during a storm.
You might discover that the water needs more shade or that a feeder is difficult to reach in winter. A shrub may grow faster than expected. Birds may show you that an unplanned corner is more valuable than the area you spent weeks designing.
Let them influence the next version.
You can even use your sanctuary observations for something bigger. Keep a yard list, submit sightings to a citizen-science project such as eBird, join a Christmas Bird Count or share native plants and habitat ideas with a neighbor. None of these things has to become another obligation. They are simply ways your small backyard project can connect to bird conservation beyond your fence.
Start With One Square
A backyard bird sanctuary does not need to be large, expensive or finished.
It needs food, water, shelter and a safer place for birds to move through their day. It also needs a person willing to notice what is already happening and make thoughtful improvements over time.
That is why graph paper is such a useful place to begin.
It lets you dream without overspending. It helps you see empty lawn as possible habitat. It shows you where a shrub could connect two patches of cover, where a birdbath could bring new visitors into view and where a chair could become your favorite place to begin the morning.
Draw the yard you have. Add the habitat it is missing. Then choose one square—one small, manageable part of the plan—and begin there.
The birds do not need you to finish everything this weekend.
They simply need you to start.
Read How to Create Layers in Your Backyard for More Birds next.
