

The Complete Guide to Bird Baths:
Placement, Cleaning, DIY Ideas and More
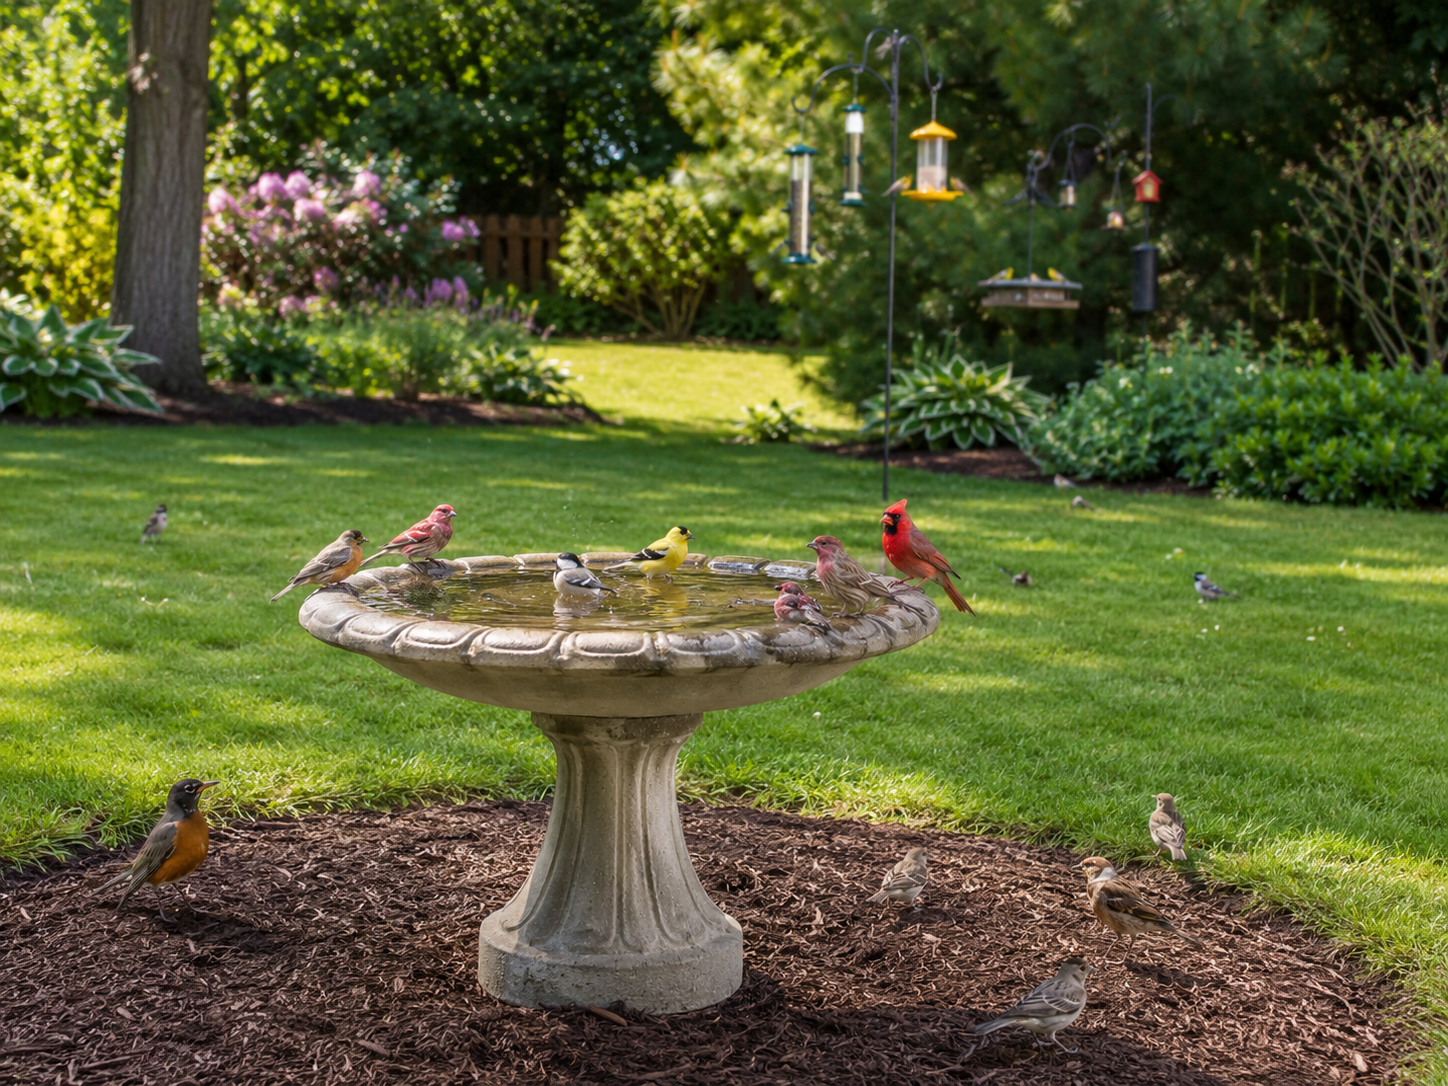
A bird bath may be one of the simplest additions you can make to your backyard bird sanctuary. It does not require a large yard, an elaborate garden plan, or an expensive stone fountain. In fact, birds often prefer a plain, shallow pan of clean water over the impressive concrete bird bath that serves as the centerpiece of the garden.
Water brings something different to the backyard than feeders do. Seed feeders attract birds that eat seeds, nuts, or suet, but every bird needs water. A dependable bird bath may bring in robins, bluebirds, thrushes, warblers, vireos, waxwings, and other birds that rarely show much interest in a feeder.
A bird bath also gives you a wonderful opportunity to observe behavior. Birds approach water cautiously. They often land nearby, look around for danger, hop to the edge, take a drink, and then suddenly throw themselves into a full-body splash. Afterward, they usually retreat to a branch where they shake, preen, and carefully put every feather back in place.
The secret is not simply putting out water. It is creating water that is shallow, clean, visible, and safe.
Why Birds Need Bird Baths
Birds need water for both drinking and bathing. Even species that obtain some moisture from fruit, insects, nectar, or other food still benefit from a reliable source of fresh water.
Bathing is also part of feather maintenance. When a bird splashes in shallow water, it loosens dust, dirt, and debris caught among its feathers. After bathing, the bird preens, realigning the feathers and distributing protective oils. Properly maintained feathers provide insulation, shed rain, and help the bird fly efficiently.
Water can be especially valuable during summer heat, drought, migration, and winter freezes. During migration, a visiting bird may discover your backyard because it hears dripping or splashing water below. Cornell Lab notes that adding fresh water may attract birds that do not eat seed and would not otherwise visit a feeder.
What Makes a Good Bird Bath?
The best bird bath resembles something a bird might find in nature: a puddle, a shallow stream edge, or a rain-filled depression in a rock.
It should have:
Shallow water
A gently sloping or graduated bottom
A surface that is not overly slippery
A stable base
An open view of the surroundings
Nearby escape cover (but not so close that predators - cats, hawks, & snakes can be too close)
Water that is easy for you to replace and clean
A wide basin is generally more useful than a narrow, deep bowl. Several birds may use a wide bath at once, and birds of different sizes can select the depth that feels comfortable.
The material is less important than the design and maintenance. Plastic plant saucers, glazed ceramic basins, resin baths, stone dishes, metal pans, and concrete baths can all work. However, the basin should be easy to lift, empty, scrub, and rinse. A spectacular bath that is too heavy to clean will eventually become a spectacularly dirty bath.
Very smooth glazed surfaces can be slippery. Add several flat stones or rough pebbles to give birds secure footing and help them judge the depth.
Why a Bird Bath Cannot Be Too Deep
Many commercial bird baths are designed more for people than for birds. They may look elegant, but their basins are often too deep and their sides too steep.
Most backyard songbirds are not swimming birds. They want to stand in the water, not float in it. Deep water can make small birds hesitant to enter, and steep or slick sides can make it difficult for them to climb out.
A good bird bath should be approximately one inch deep around the edges and gradually slope to no more than about two inches in the middle. Cornell Lab recommends this one-to-two-inch range, while Audubon commonly recommends water around one to one-and-a-half inches deep.
Shallow water allows a chickadee, sparrow, or warbler to keep its feet firmly on the bottom while it drinks or bathes. It also lets the bird see exactly where it is stepping.
If you already own a deep bird bath, you do not necessarily need to replace it. Add several large, stable stones, a layer of clean river pebbles, or an upside-down shallow saucer to create shallower sections. Make sure the rocks cannot wobble or trap a bird’s foot.
A flat stone that rises slightly above the water is particularly useful. Birds can land on it, drink without getting wet, or ease gradually into the bath.
Where Should You Place a Bird Bath?
Placement can determine whether your bath becomes a busy backyard gathering place or an ignored garden ornament.
Choose partial shade
A location with morning sun and afternoon shade is ideal in many yards. Shade helps keep the water cooler, slows evaporation, and may reduce the speed at which algae develops. Cornell recommends placing bird baths in shade during hot weather when possible.
Avoid placing the bath directly under a heavily used feeder or a branch where birds regularly perch. Seed hulls, droppings, leaves, and other debris will quickly contaminate the water.
Give birds an open view
Bathing birds are temporarily distracted and vulnerable. They need to be able to see an approaching cat, hawk, or other threat.
Place the bath where the ground around it is relatively open. Avoid tucking a ground-level bath against tall grass or dense shrubbery where a cat could hide.
Provide nearby escape cover
Birds still appreciate a tree or shrub within a few quick wingbeats. After bathing, they often fly to a branch to shake and preen.
The goal is a balance: nearby branches for escape and preening, but enough open space around the bath to prevent a predator from creeping directly to the edge.
Put it where you can see and maintain it
A bird bath should be visible from a window, porch, patio, or favorite chair. Part of the joy is watching it.
It should also be close enough to a hose, outdoor faucet, or door that changing the water does not become a major production. The easier the bath is to maintain, the more likely you are to keep it clean.
Is a Ground-Level Bath Better?
Birds often find natural water at ground level, so a shallow ground bath can be extremely attractive. Robins, towhees, thrushes, doves, sparrows, and migrating warblers may readily investigate it.
Ground baths do require extra attention to cats and other predators. In yards where outdoor cats are common, an elevated or pedestal bath may be safer. Keep the surrounding area open and avoid placing the bath beside dense hiding cover.
There is no rule saying you must choose one style. A backyard sanctuary can include a pedestal bath near the garden and a shallow ground basin in another open area. Different birds may prefer different heights.
Check our recommendations at the Rather Be Birding Essentials Store!
Easy DIY Bird Bath Ideas
A bird bath does not need to be expensive. Some of the best options can be assembled from items you already have.
1. The plant-saucer bath
Use a large, shallow plastic or non-glazed plant saucer. Set it directly on level ground, on a tree stump, or on several stable bricks.
Add one or two flat stones and fill it with about an inch of water. Plastic saucers are lightweight, inexpensive, and easy to scrub. Replace them if they become cracked or develop rough, difficult-to-clean surfaces.
2. The trash-can-lid bath
A clean metal or heavy-duty plastic trash-can lid can create a wide, gently sloping bath. Turn it so the shallow depression holds water and place it on level soil or a low platform.
Cornell and the RSPB both suggest repurposing shallow lids, pans, and trays as simple bird baths.
Make sure there are no sharp edges, peeling coatings, rust flakes, or chemical residues.
3. The terra-cotta saucer on a stump
A broad terra-cotta saucer placed on a sturdy stump creates an attractive, natural-looking bath. Terra-cotta can become slimy or stained, so scrub it regularly and bring it inside during hard freezes to prevent cracking.
Choose a lead-free saucer intended for outdoor use, and avoid decorative containers with unknown paints or glazes.
4. The multi-level water station
Place several shallow containers at different heights. One can sit on the ground, another on a low stump, and a third on a pedestal.
This provides options for ground-feeding birds, small songbirds, and larger species. It also reduces crowding when the backyard is busy.
5. The slow-drip bath
Punch a tiny hole near the bottom of a clean plastic jug or bucket. Hang it over the bath and fill it with water so it releases a slow, steady drip.
The sound of dripping water helps birds locate the bath. Cornell specifically recommends dripping or moving water and suggests making a simple dripper from a recycled container.
Test the drip rate before leaving it. You want an occasional drop, not a stream that empties the container in twenty minutes.
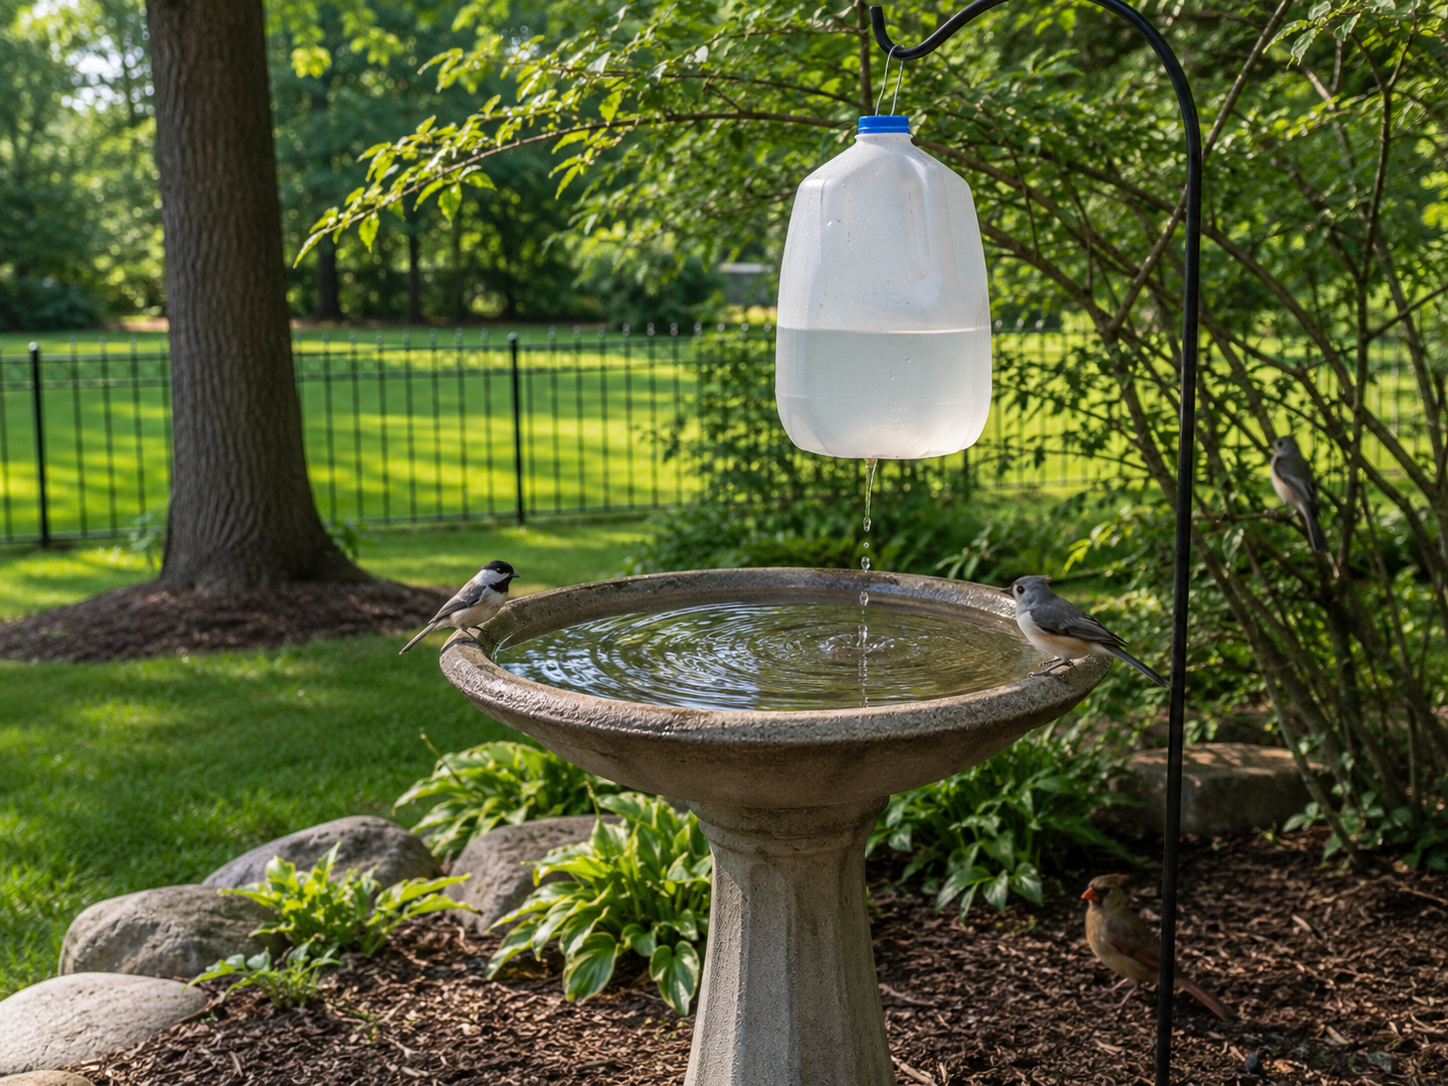
VERY SLOW DRIP - control with bottle cap and make a tiny prick hole in the bottom of the jug.
6. The rock-and-bubbler bath
Place a small recirculating pump in a basin and arrange stones around it so water bubbles gently over the rocks.
This style can be especially appealing to hummingbirds, warblers, and other small birds that may prefer wet rocks, mist, or a thin sheet of moving water over standing in a basin.
Protect the electrical connection with outdoor-rated equipment and a ground-fault circuit interrupter.
How Often Should You Change the Water?
Fresh water matters more than the cost or appearance of the bath.
During warm weather, dump and replace the water every day or two. At an absolute minimum, replace it every few days. Cornell advises changing bird-bath water at least every three days and more frequently in warm conditions.
Replace it immediately when you notice:
Bird droppings
Feathers or seed hulls
Dead insects
A cloudy appearance
A slimy surface
Algae
An unpleasant odor
Simply adding fresh water to dirty water is not enough. Empty the old water completely and rinse the basin before refilling it.
Regular water changes also help prevent mosquitoes. The CDC recommends emptying and scrubbing bird baths and other water-holding containers at least once a week because mosquito eggs can remain attached to the container’s inner surfaces.
How to Clean a Bird Bath
Give the basin a quick rinse whenever you replace the water and a thorough scrubbing at least once a week. In hot weather or during periods of heavy use, clean it more often.
Use a stiff brush reserved only for bird baths. Scrub the bottom, sides, rim, rocks, and any fountain parts. Very hot water and firm brushing are often enough for routine cleaning. Cornell recommends scrubbing immediately when algae begins to appear.
For a deeper disinfection—particularly after seeing sick birds or during a wildlife disease advisory—use a solution of one part household bleach to nine parts water. Scrub or soak the basin, rinse it extremely thoroughly, and allow it to air-dry before refilling. USGS has recommended this 10-percent bleach solution during bird-disease events.
Wear gloves and wash your hands afterward. Never mix bleach with vinegar, ammonia, soap, or any other cleaner.
Avoid adding algae-control chemicals, essential oils, detergents, pesticides, pool chemicals, or disinfectants directly to water available to birds.
Does Copper in a Bird Bath Help?
Copper can slow the growth of algae and some microorganisms because it releases copper ions into the water. This is the science behind copper-based algaecides and the popular suggestion to place copper objects in bird baths.
However, there are several important catches.
The amount of copper released depends on the purity of the metal, water chemistry, acidity, temperature, surface area, and length of exposure. That makes the concentration difficult to control in a small basin. Copper is an essential nutrient in tiny amounts, but excessive exposure can be toxic to birds and other wildlife. Copper compounds used to control algae have caused poisoning when they accumulated in water environments.
Pennies are particularly questionable. Modern U.S. pennies are primarily zinc with only a thin copper coating. Coins can also carry dirt, oils, corrosion, and residues. Even sources that discuss the penny trick caution that other metals may contaminate the water.
My recommendation is simple: do not add pennies, copper sulfate, or improvised pieces of copper to a bird bath. There is no need to introduce a difficult-to-measure substance when frequent water changes and scrubbing work reliably.
A commercially manufactured copper bird bath is a somewhat different question. A quality copper basin made for outdoor water use is not automatically dangerous, but it still requires regular rinsing and cleaning. Copper may slow algae; it will not remove droppings, feathers, decomposing leaves, mosquito eggs, or disease organisms.
Copper is a possible maintenance aid—not a substitute for fresh water.
Are Solar Fountains Good for Bird Baths?
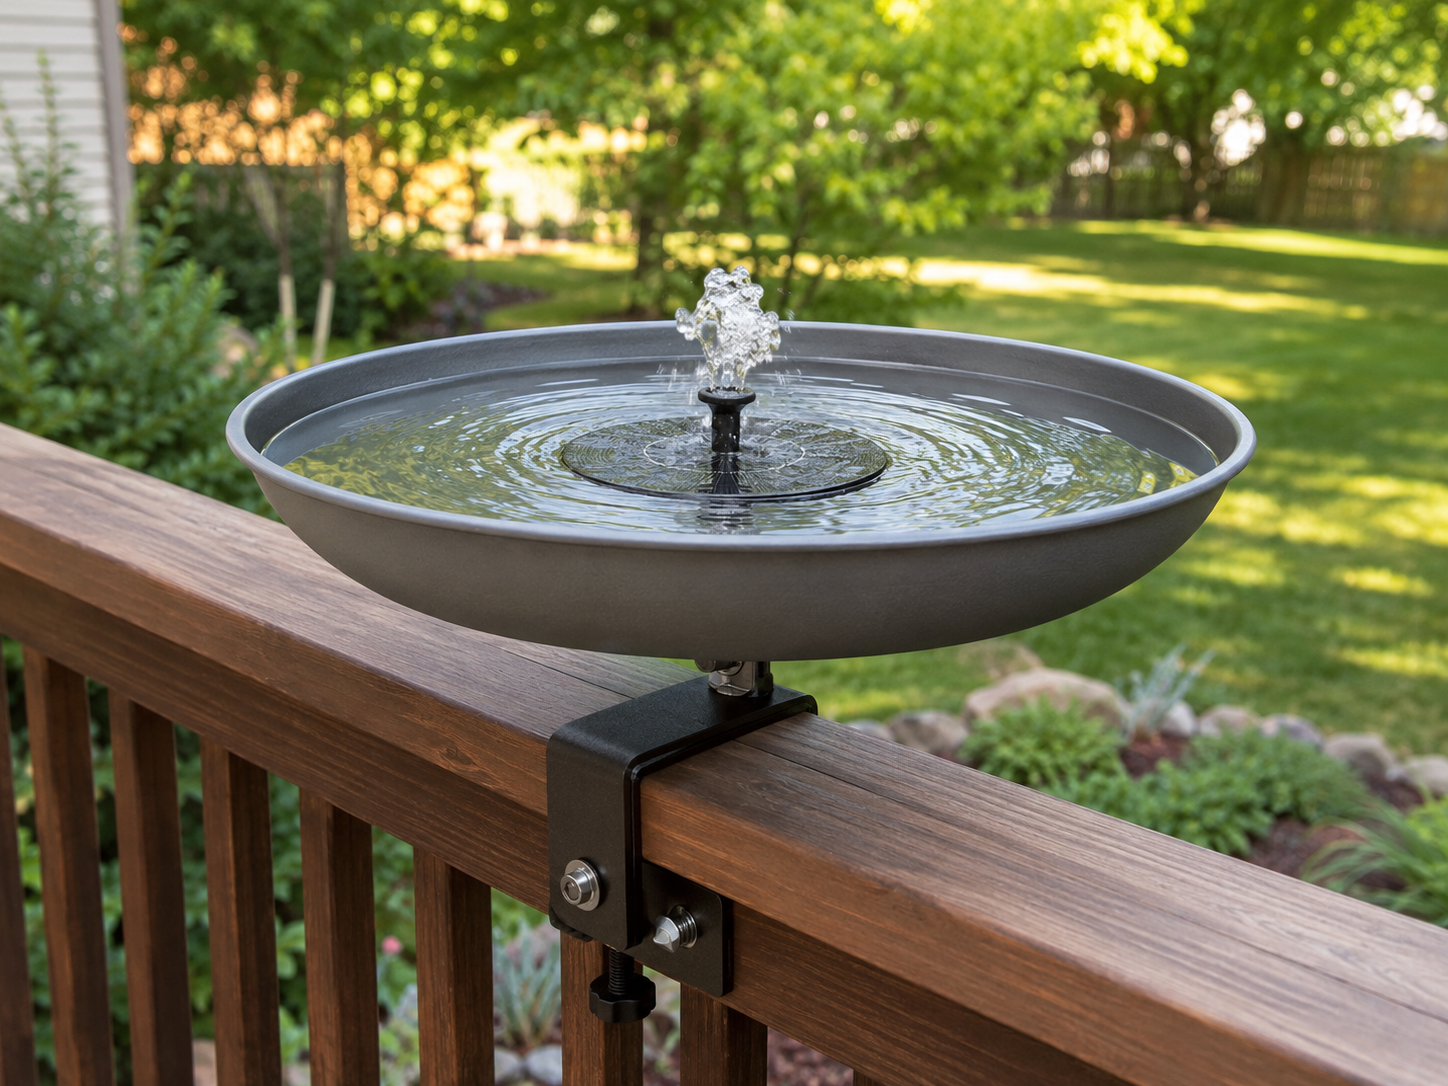
A solar fountain can make a bird bath much more noticeable. Birds often investigate the sight and sound of rippling, dripping, or splashing water. Moving water may also slow algae growth and make the surface less inviting to mosquitoes, although it does not eliminate the need to dump and scrub the basin.
Solar fountains are inexpensive and usually easy to install. Many consist of a small floating panel with a pump underneath. When direct sunlight reaches the panel, the pump sprays water through a nozzle.
They do have a few limitations:
Most basic models stop when clouds block the sun.
A strong spray can empty a shallow bath surprisingly quickly.
Pumps clog with feathers, algae, seeds, and debris.
Floating units may drift to the edge and spray water onto the ground.
A fountain does not sanitize the water.
The pump must remain submerged or it may burn out.
For a bird bath, choose the gentlest bubbler or low-spray attachment. A dramatic vertical jet may look attractive, but a soft bubbling action keeps more water in the basin and is usually easier for birds to use.
Clean the pump and intake regularly. Remove trapped debris, rinse the filter, and check the basin’s water level daily.
One useful setup is a fountain with a separate solar panel connected by a cord. The panel can sit in full sun while the bird bath remains in partial shade. This keeps the water cooler without depriving the pump of sunlight.
4 DIY PROJECTS - You can have a New Bird Bath Today!
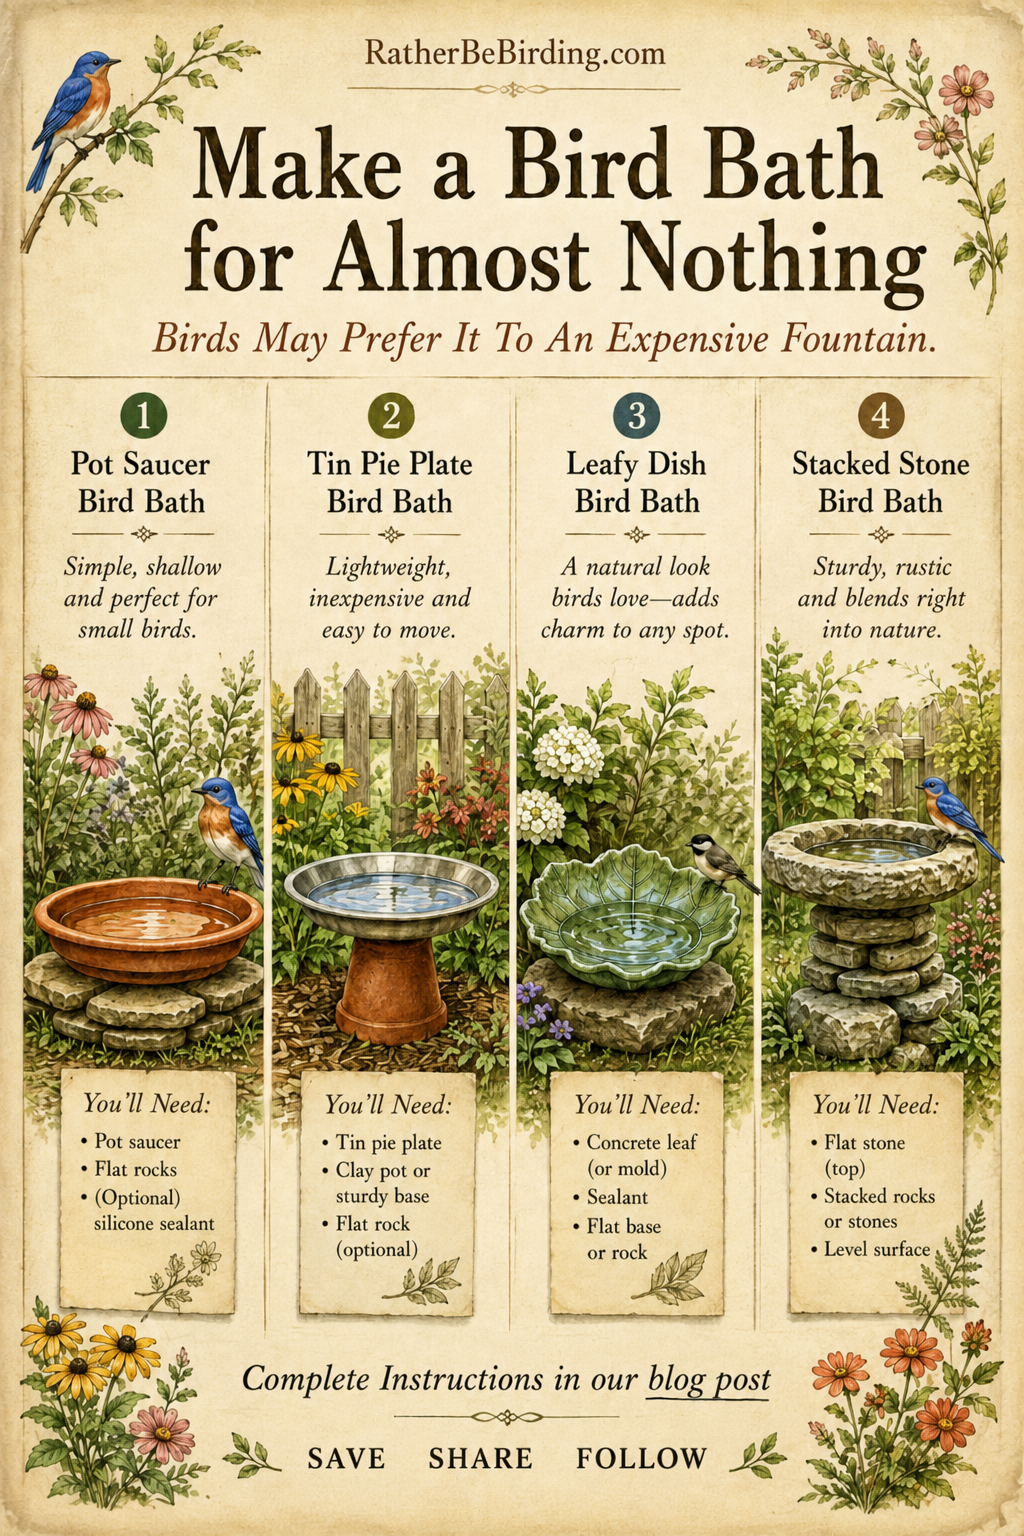
1. Pot Saucer Bird Bath
A large flowerpot saucer makes one of the easiest and most useful homemade bird baths. Birds often prefer its broad, shallow shape to a deeper decorative basin.
You’ll Need
A wide terra-cotta, plastic, or glazed plant saucer
Several flat rocks or pavers
One or two small flat stones for the water
Water
Optional: bird-safe outdoor sealant
Directions
Choose a saucer that is broad and shallow. A diameter of about 14 to 18 inches gives birds enough room to stand and splash.
Inspect the saucer for sharp edges, cracks, peeling paint, or unknown coatings. Avoid containers that have held chemicals.
Select a level, open location where birds can see approaching predators. Keep dense shrubs and hiding places several feet away, while still providing a tree or shrub within a short flight for escape and preening.
Build a simple base with two or three flat rocks or pavers. Make sure the base does not wobble.
Place the saucer securely on top. A ground-level saucer can also be set directly on firm, level soil.
Add one or two flat stones inside the saucer. These give small birds secure footing and create a shallow landing place.
Fill the saucer with approximately one inch of water around the edges and no more than two inches at the deepest point.
Watch the bath for a few minutes to make sure the base remains stable and the saucer does not tip when a bird lands on the rim.
Optional Finishing Step
Unglazed terra-cotta may lose water through evaporation and absorption. A bird-safe, nontoxic outdoor sealant can reduce water loss, but it must be fully cured according to the manufacturer’s instructions before the bath is filled.
Care
Dump and replace the water every day or two during warm weather. Scrub the saucer at least weekly with a stiff brush and rinse it thoroughly.
2. Tin Pie Plate Bird Bath
A metal pie plate or shallow pan can be turned into an inexpensive bird bath with a flowerpot, stump, or sturdy outdoor base.
You’ll Need
A shallow metal pie plate or round metal pan
A sturdy clay pot, stump, or stable platform
One flat rock
Water
Optional: weather-resistant adhesive
Directions
Choose a shallow metal plate that is free of rust, sharp edges, peeling coatings, and chemical residue.
Wash the plate thoroughly before using it.
Turn a large clay flowerpot upside down to create a pedestal. You can also use a level tree stump, paver stack, or other solid outdoor base.
Set the plate on top and test it for stability. Press lightly on each side to make sure it cannot slide or tip.
For a permanent setup, attach the plate to the base with an outdoor adhesive suitable for both materials. Allow it to cure completely before adding water.
Place a flat stone in the plate. The stone helps weigh down a lightweight pan, provides secure footing, and gives small birds a dry place to land.
Add shallow water. Keep the depth around one inch whenever possible.
Place the finished bath in partial shade with a clear view of the surrounding yard.
Important Note
Metal can become hot in direct summer sun. Place this bath in partial shade and check the water temperature during hot weather. Replace the water if it becomes warm.
Care
Metal pans are lightweight and easy to clean. Empty, rinse, and refill frequently. Replace the plate if it begins to rust or develop rough edges.
3. Concrete Leaf Bird Bath
A concrete leaf bath adds a handmade garden feature while still giving birds the shallow water they prefer. Large leaves such as hosta, rhubarb, elephant ear, or burdock can be used as natural molds.
You’ll Need
One large, strongly veined leaf
Sand or loose soil
Concrete or mortar mix
Water for mixing
Gloves
Plastic sheeting
A wire brush or stiff brush
Bird-safe masonry sealer
A flat stone, stump, or low base
Directions
Choose a large leaf with strong veins and no major tears.
Build a low mound of damp sand or soil. Shape the mound into a gentle curve. This curve will determine the depth of the finished bath, so keep it shallow.
Place the leaf face down over the mound. The heavily veined underside should face upward.
Put on gloves and mix the concrete according to the package directions.
Spread the concrete over the back of the leaf. Begin with a thin layer, then gradually build it to roughly one to two inches thick.
Keep the edges rounded and smooth. Avoid creating thin, fragile points that may break.
Cover the project loosely with plastic and allow it to cure according to the concrete manufacturer’s directions.
Once cured, turn the piece over and peel away the leaf. Use a brush to remove small pieces trapped in the veins.
Smooth any sharp edges with sandpaper, a masonry file, or a rubbing stone.
Allow the concrete to finish curing fully. Fresh concrete can affect water chemistry, so do not offer it to birds immediately.
Apply a nontoxic, bird-safe masonry sealer if desired. Let it cure completely before filling the bath.
Set the finished leaf on a stable, level rock, low pedestal, or firm ground surface.
Add no more than one or two inches of water. Place a small flat stone in the deepest section if needed.
Care
The textured leaf surface can collect algae and debris, so scrub it regularly. Inspect it occasionally for cracks or sharp chips.
4. Stacked-Stone Bird Bath
A stacked-stone bird bath has a rustic, natural appearance and can be built from flat rocks collected from your property or purchased from a landscape supplier.
You’ll Need
Several broad, flat stones
One wide, shallow stone, stone basin, or sealed dish for the top
A level outdoor location
Sand or gravel for leveling
Optional: exterior masonry adhesive
One small flat landing stone
Water
Directions
Select a location with firm, level ground. A stacked bath should not be placed where soil regularly becomes soft or muddy.
Remove loose vegetation and level the ground. Add a thin layer of compacted sand or gravel if needed.
Choose the widest, heaviest stone for the base.
Stack the remaining stones gradually, keeping the center of gravity low. Rotate each rock until it rests securely without wobbling.
Do not build the pedestal too tall. A low, sturdy stack is safer and easier to maintain than a narrow tower.
Place the broadest, shallowest stone or basin on top. A naturally cupped rock can work, but it must hold water without being dangerously deep.
Test the entire structure by pressing gently on several sides. Reposition any unstable rocks.
If you want a permanent setup, secure the stones with an outdoor masonry adhesive. Let it cure fully before use.
Add a small landing stone inside the basin if the surface is smooth or the center is deeper than one inch.
Fill the bath with shallow water. Keep the deepest area under two inches.
Important Note
Natural stone can be rough, which gives birds excellent footing, but cracks may collect dirt and algae. Avoid rocks with sharp flakes, unstable layers, or crumbling surfaces.
Care
Lift off the top basin when possible and scrub it regularly. Check the stacked base after storms, freezes, soil movement, or visits from large animals.
Safety Tips for Every DIY Bird Bath
No matter which design you choose, the same basic rules apply.
Keep the water shallow. Most songbirds want to stand in the water rather than swim. Aim for approximately one inch around the edge and no more than two inches in the center.
Make sure every component is stable. A bath should not rock, slide, or tip when a bird lands on one side.
Avoid sharp metal, broken pottery, flaking paint, pressure-treated scraps, and containers that have held chemicals.
Use only materials and sealants labeled nontoxic and suitable for outdoor water exposure. Allow adhesives, concrete, paint, and sealants to cure completely before birds use the bath.
Place the bath where birds have a clear view of the surrounding area. Nearby cover is helpful, but dense shrubs should not be close enough to conceal a stalking cat.
Refresh the water often and scrub the bath weekly. A homemade bird bath needs the same cleaning routine as an expensive fountain.
A simple, shallow bath may not be the fanciest feature in the garden, but to a thirsty robin or migrating warbler, it can be exactly what your backyard sanctuary needs.
The Best Bird Bath May Be the Simplest
Birds do not care whether their bath matches the patio furniture. They care whether they can approach it safely, stand securely, drink without leaning into deep water, and escape quickly when danger appears.
Start with a wide, shallow basin. Place it where birds can see their surroundings. Add a flat stone. Keep the water no more than one or two inches deep. Change it frequently and scrub the basin before it becomes slimy.
Then watch.
A robin may arrive first, splashing so enthusiastically that half the water ends up on the ground. A goldfinch may perch delicately on the rim. A migrating warbler may appear for only a few minutes, drawn into your yard by the quiet drip of water.
That is the real value of a bird bath. It is not merely a garden decoration. It is one more layer of habitat—a small but dependable resource that can make your backyard safer, richer, and far more interesting for birds.
Read another in our Backyard Bird Sanctuary series aptly named The Backyard Bird Sanctuary Guide!
Consider how to feed your backyard friends and read the RBB Ultimate Guide to Backyard Bird Seed.
